ISTE Standards & NGSS Science & Engineering Practies

Thursday, April 14, 2016

Using a TinyAVR Programmer with Codebender

Updated 30 October 2016:  Codebender is closing.

Here's a tutorial I put together to help you get started.  Under Codebender's Terms and Conditions, students must be 13 or older to use Codebender.

The TinyAVR Programmer is available at Spark Fun.


Friday, March 18, 2016

Resistors

Although I've been working with LEDs for a while, I'm hesitant to admit that I haven't made a concerted effort to learn about resistors and Ohm's law until recently. Although the concept is the same for any circuit, I haven't seen many examples that specifically address how resistors work with paper circuitry.

Students that I've worked with have been discovering that not all LEDs play well with one another, but I haven't figured out a simple way to explain forward current, other than to say that "electrons are lazy."  (Although this amazing experiment, which I just discovered on on Jie Qi's flicker feed, is an incredibly useful visual representation!)

Although my understanding of resistance, current, and voltage is not as robust as I'd like it to be, I'm starting to understand how it all comes together.  My goal is to understand it well enough that I can figure out a way to explain it as simply, accurately, and confidently as possible.

Here are a couple of experiments I recently conducted to demonstrate a phenomenon that students experience when they are trying to use a blue (3.2 V) and red (2.2 V)  LED within the same circuit. The LED with the lower forward voltage (red) will receive the current without a resistor.  I've demonstrated how a couple of different types of resistors impact this phenomenon below.


Of note, Circuit Stickers (not shown here) have resistors built in, so your students wouldn't encounter this issue.

Sunday, February 7, 2016

Flying Saucer: I've got a servo running on an ATtiny85, thanks to Jeannine Huffman!


I have been following Jeannine Huffman's (and Jim Bock's) work of getting a servo to run on an ATtiny85. When she shared her process, I ordered the parts and got right to work!  I used a TowerPro SG90 hobby motor that I ordered off of Amazon.

My servo moves smoothly for about 30 seconds, but then it sort of stalls out.  It will start again if I turn it off and on again.  I may have issue with my power supply.  I am using 2 coin cell batteries.


This pop-up was a rapid prototype.


Thursday, January 7, 2016

Alien Neopixel Book (Second Edition)


This is the second alien book that I've made with surface mounted neopixels.  Like the previous model, this one has three RGB LEDs activated with a push button.  One thing that I did differently on this model was move the location of the battery away from the fore edge and closer to the spine.  I did this because I am continuing to have mixed results with the surface tension on embedded batteries.  I'm hoping that the battery compartment will be more secure if it's closer to the inside of the book block.

Consequently, I also changed the locations of the switch, push button, and ATtiny, allowing the added benefit of fewer cross-overs.  This was a good exercise, rather than simply repeating a circuit design I'd used before.

Soldering the neopixels is by far the most challenging part. I'm not sure that a project like this would be wise to attempt in a classroom setting. I'd thought my soldering would be more elegant this time around, but even a third hand tool didn't do the trick.


Sunday, December 20, 2015

Blinking Alien Spaceship Book Using Neopixels & an ATtiny85


Solder the neopixels before removing the adhesive from the copper tape.
In the process of prototyping, to see if I could get individually addressable neopixels (surface mounted RGB LEDs) to work in a paper circuit, I've learned a couple of tricks.
The most important one is to solder the LEDs to the copper tape before creating the rest of the circuit. Compared to my first botched attempt, in which I tried to solder neopixels to copper that was already adhered to paper, soldering the LEDs to the copper first was far less fiddly.
Although I had to use a multimeter to isolate a wonky joint (the result to too many cross-overs) I was eventually able to get three LEDs to work the way I'd intended.  Each light changes colors!

In this project, I've added a LilyPad button board in addition to a LilyPad slide switch.


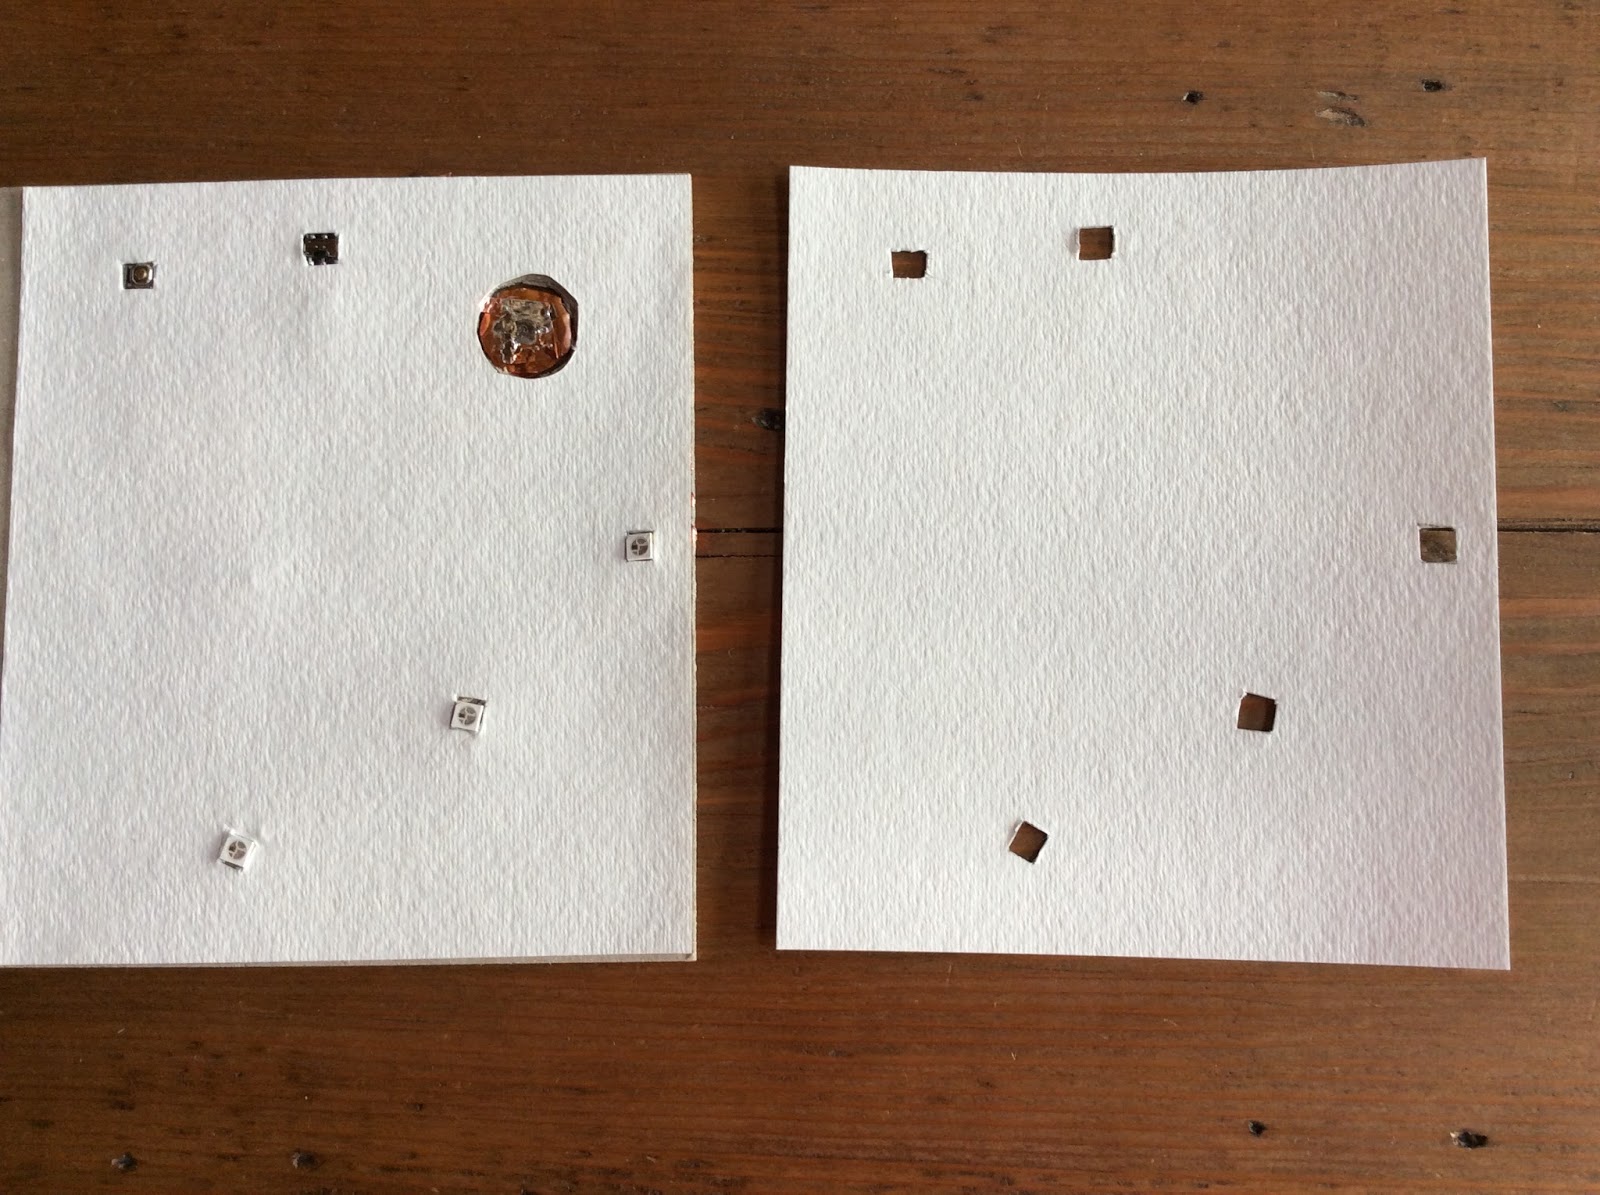
Something else that I've done differently is add two layers of watercolor paper to the binder's board, with notches cut out for the LEDs, button, and switch.  Neopixels are thicker than other SMD LEDs, so the extra paper helps smooth out the surface of the book covers.  I added one layer of watercolor paper to the inside covers as well, hoping to increase the surface tension on the battery. 

Rough sketch
I painted the design and sealed it with acrylic gel medium.


Saturday, December 19, 2015

Alien Paper Circuit with Neopixels & an ATtiny85

Chainable, surface mounted RGB LEDs work in paper circuits! 

After spending a couple of days prototyping, I've completed my first paper circuit using individually addressable neopixels, otherwise known as surface mounted RGB LEDs! Soldering them was trickier than I'd anticipated, however!  I'd originally planned to use three lights in this model, but a soldering mishap resulted in my using only two.  I love the way that the lights change colors at the press of a button!  (See video below).


Thursday, December 3, 2015

Video: Programming an ATtiny85 Microprocessor with a Chromebook

Updated 30 October 2016:  Codebender is closing.  

Programming an ATtiny85 with a Chromebook

I recently completed a video tutorial to teach others how I program the ATtiny85 using a Chromebook.
I'm cross-posting it to this blog as a resource for budding notebook hackers.